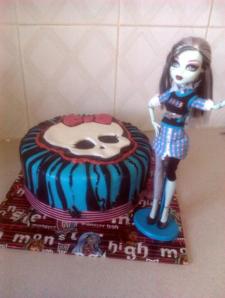
For my girl’s birthdays this year, I decided to let them choose whatever theme they wanted, with the aim to make as many of the party items as possible. Of course, Miss 7 chose Monster High as her theme, and wanted a disco party at the local RSL club. Since the club provides the food and entertainment, all I had to do was supply the cake, and make some invitations in the Monster High theme.
I wasn’t really sure how I was going to do this, until my sister started talking about ordering digital invitations, and printing them out on photo paper. She showed me some examples of Minnie Mouse invitations, and I quickly assured her that I could do them myself in Photoshop to save her some money. This is where the Monster High invitation idea was born.
Having used the basics of Photoshop in the past to play with digital scrapbooking elements, I knew I could just apply the same principles to the invitation process. I simple Googled “Monster High” in the image search, and saved all the ones I thought might look ok on an invitation. Of course, and image with the main characters was a must for Miss 7, as was the Skullette, and the Monster High School crest.
A bit of layering; a little resizing and free transforming; some added text; a few drop shadows etc, and within an hour I had this (excuse the blanked out contact details):
My sister was pretty impressed, and agreed that I could have a crack at making my nieces Minnie Mouse invitations, so I searched for some Minnie Mouse images, and came across some digital scrapbooking papers and elements that would be perfect. I purchased them, downloaded, and set to work. The end result was exactly what my sister was after, and again, i had the invitation done in under an hour.


Next on my list are the invitations for my other daughters birthday party next month. She is having a Rainbow High Tea for her 5th birthday, and I will also be using Photoshop to make her invitations, along with cupcake toppers and wrappers; name tags for goodie bags and drinks; and labels for platters of food etc.
If you think you might like to try making digital invitations in Photoshop, the following links have some great tutorials on how to do so. The instructions are easy to follow, and there are screenshot images to demonstrate the different steps involved.
http://www.madtuts.com/2010/01/create-a-professional-party-invitation-in-photoshop/
http://bloomwebdesign.net/myblog/2011/08/08/create-a-print-ready-invitation-in-photoshop/
Related articles
- Minnie Mouse Party (amultifariousme.wordpress.com)


